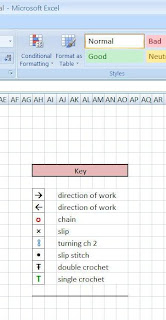
For the heading, I merged eight cells together, shaded the resulting cell, and drew a border around it. I then inserted the symbols that I wanted using the "Symbol" menu icon seen below on the far right.
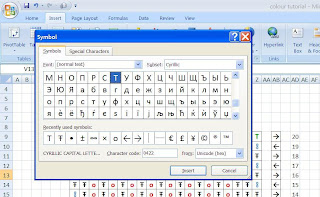
You can see from the screen shot above that my "recently used symbols" include the items in my Key. Explore and see what you can find among the fonts on your computer, and when you find symbols that you like, click on them and then click "insert" (make sure that you have selected the cell on your worksheet where you want the symbol to be first).
Once I have completed my "key" I draw a border around each symbol. I also change the colour of each symbol so that they show up on the chart a little better, but that is a personal preference. To do this, you use the text colour function, not the paint function (paint changes the cell background colour, not the contents). Once I have all of this set, it is then simply a matter of copying and pasting each symbol where I want it in the chart. Below is an example of a chart for a small swatch done in a mesh or filet crochet pattern.
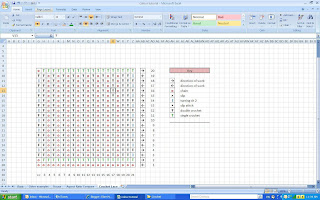
You can see that I've also added a stitch count across the bottom, and row numbering up the side, as well as "direction of work" arrows for further clarity.

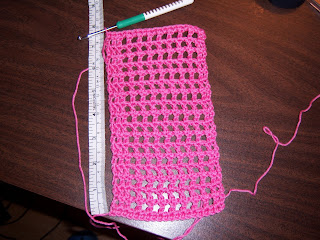
The stitches and rows are exactly as charted, but as you can see I have a rectangle that actually measures 4.5 inches wide and 7.5 inches long, which would make an aspect ratio of 1.67. Therefore, if I wanted my chart to represent the true proportions, and my cell width is 26 pixels, then I would have to make the cell height 43 pixels (1.67 x 26).
As always, comments, feedback and/or questions welcome!
No comments:
Post a Comment