For this tutorial, you can open a new Excel file, or just use the same one and work on Sheet 2. We'll use a 20 x 20 area again, the same as in Part 2, with the same cell sizes. You can refer back to
this entry for instructions on setting up the sheet.
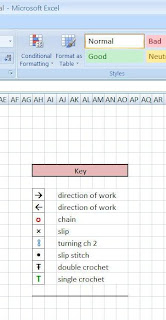
The next thing to do is to set up a Key or Legend to define the symbols we're going to use. You can put this anywhere on the sheet, I've chosen to put it just to the right of the area that I'm going to chart. Here is what my Key looks like.

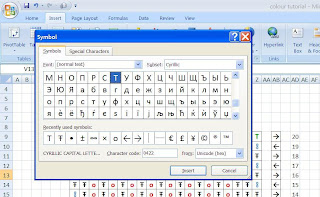
For the heading, I merged eight cells together, shaded the resulting cell, and drew a border around it. I then inserted the symbols that I wanted using the "Symbol" menu icon seen below on the far right.

When you click this icon, the following comes up:

You can see from the screen shot above that my "recently used symbols" include the items in my Key. Explore and see what you can find among the fonts on your computer, and when you find symbols that you like, click on them and then click "insert" (make sure that you have selected the cell on your worksheet where you want the symbol to be first).
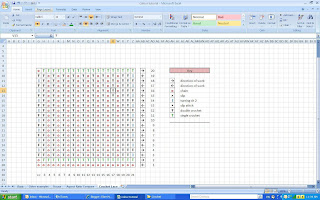
Once I have completed my "key" I draw a border around each symbol. I also change the colour of each symbol so that they show up on the chart a little better, but that is a personal preference. To do this, you use the text colour function, not the paint function (paint changes the cell background colour, not the contents). Once I have all of this set, it is then simply a matter of copying and pasting each symbol where I want it in the chart. Below is an example of a chart for a small swatch done in a mesh or filet crochet pattern.

You can see that I've also added a stitch count across the bottom, and row numbering up the side, as well as "direction of work" arrows for further clarity.
And speaking of "direction" - you may notice that in the symbol menu the symbol I chose for the turning chain 2 is two small ovals horizontally oriented, but in my key they are vertically oriented. You can change the orientation of text with this menu icon:

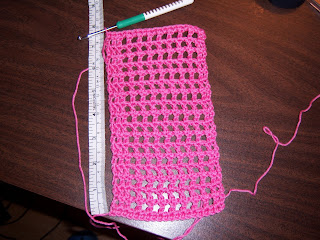
I touched on "aspect ratio" in a previous blog entry, it can become even more important with crochet, especially when using double or treble crochet stitches, where clearly stitches are much taller than they are wide. In my chart above, I kept the cells square, so the aspect ratio is 1, however, here is the resulting swatch:

The stitches and rows are exactly as charted, but as you can see I have a rectangle that actually measures 4.5 inches wide and 7.5 inches long, which would make an aspect ratio of 1.67. Therefore, if I wanted my chart to represent the true proportions, and my cell width is 26 pixels, then I would have to make the cell height 43 pixels (1.67 x 26).
As always, comments, feedback and/or questions welcome!


 Oh, yeah, it's Adam and Jaime, my favourite Mythbusters, rendered here in crochet! And, no disrespect Phil, but I do think they are a remarkable likeness, although Adam's hairline probably isn't receding quite that much! Check out


